
If WooCommerce won’t connect to QuickSync, check your WordPress permalink settings. WooCommerce requires a format other than Plain for the REST API that QuickSync uses to reach your store.
This check can help when approval takes you back to your storefront, you see a 404 page, or QuickSync says your site didn’t send its API keys. Those symptoms can have other causes too. Start with the steps below.
Open permalink settings
- Sign in to your WordPress dashboard with an administrator account.
- In the left menu, open Settings → Permalinks.
- Look at the selected option under Permalink structure.
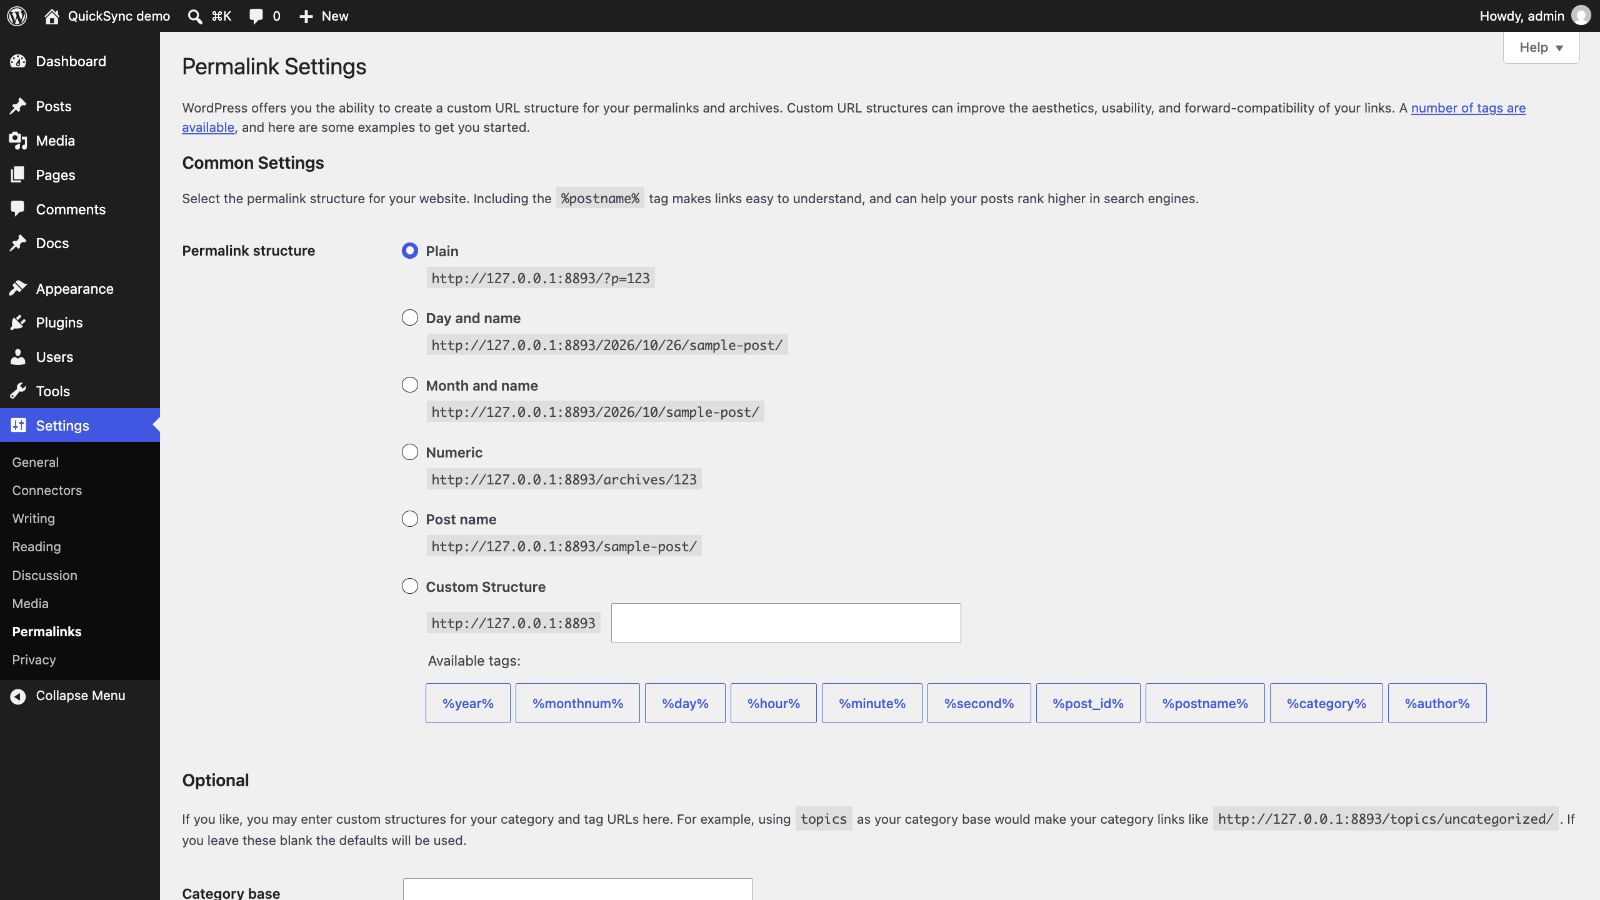
Already using a non-Plain format? Keep it selected. You can go straight to Save changes. There’s no need to switch a working format to Post name.
Choose a format
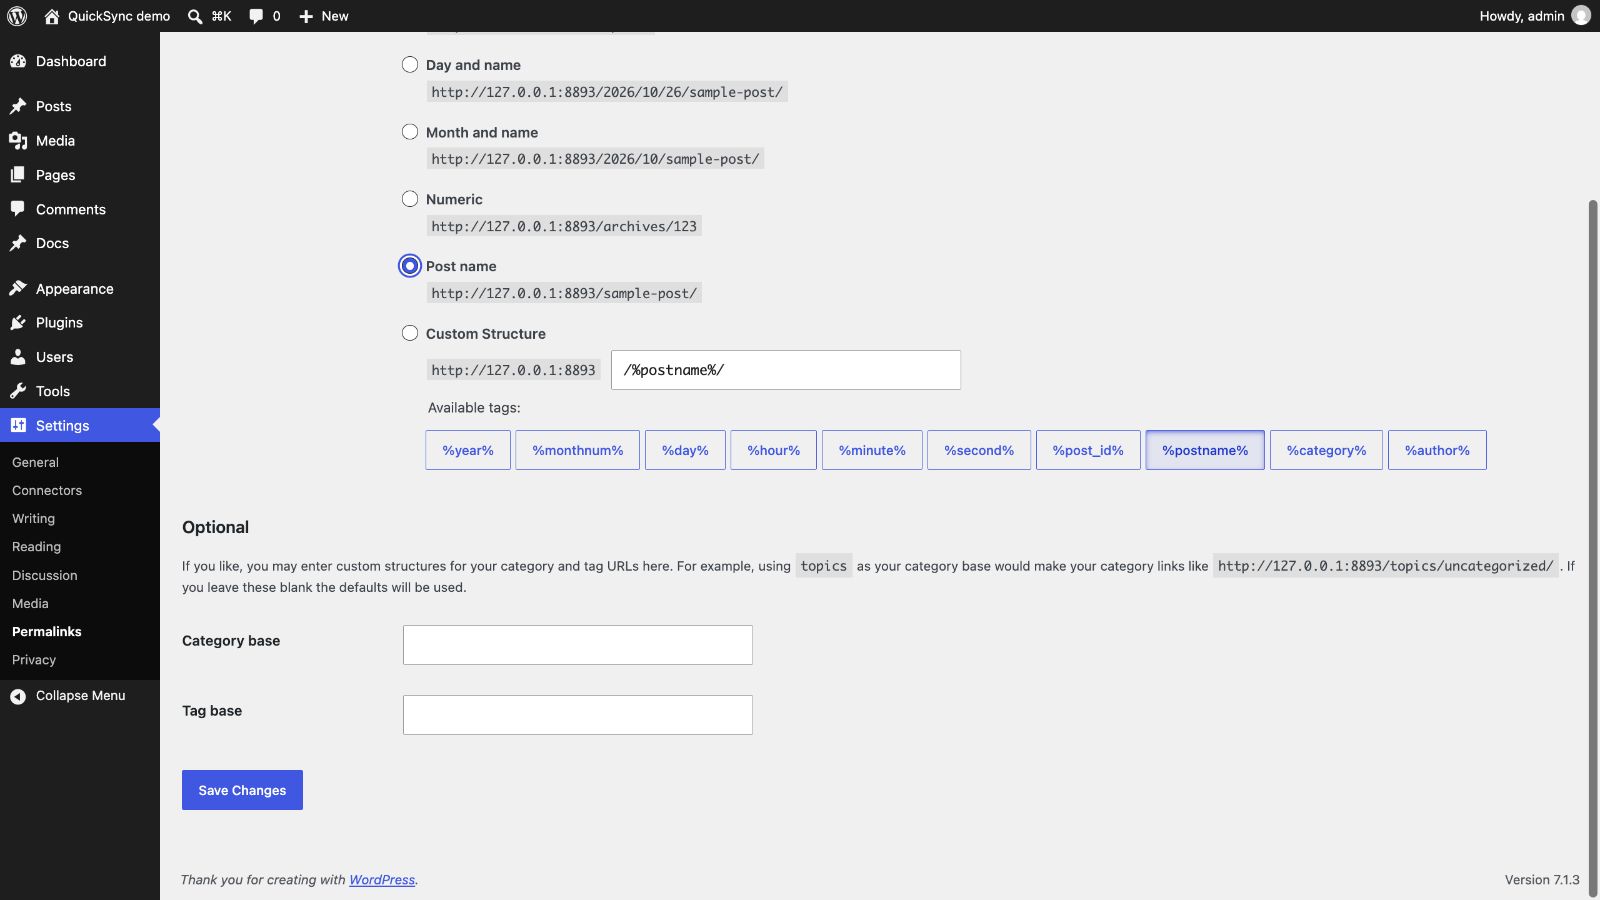
If Plain is selected, choose Post name or another non-Plain format that suits your site. Post name uses readable links, such as example.com/sample-post/, instead of example.com/?p=123.
For an established site: changing the permalink format changes post URLs. Ask your site administrator to check redirects for existing links before switching formats. Leave the optional category and tag bases unchanged unless you intend to change those URLs too.
Save changes
Scroll to the bottom of the page and click Save Changes. Choosing a radio button doesn’t save the setting on its own.
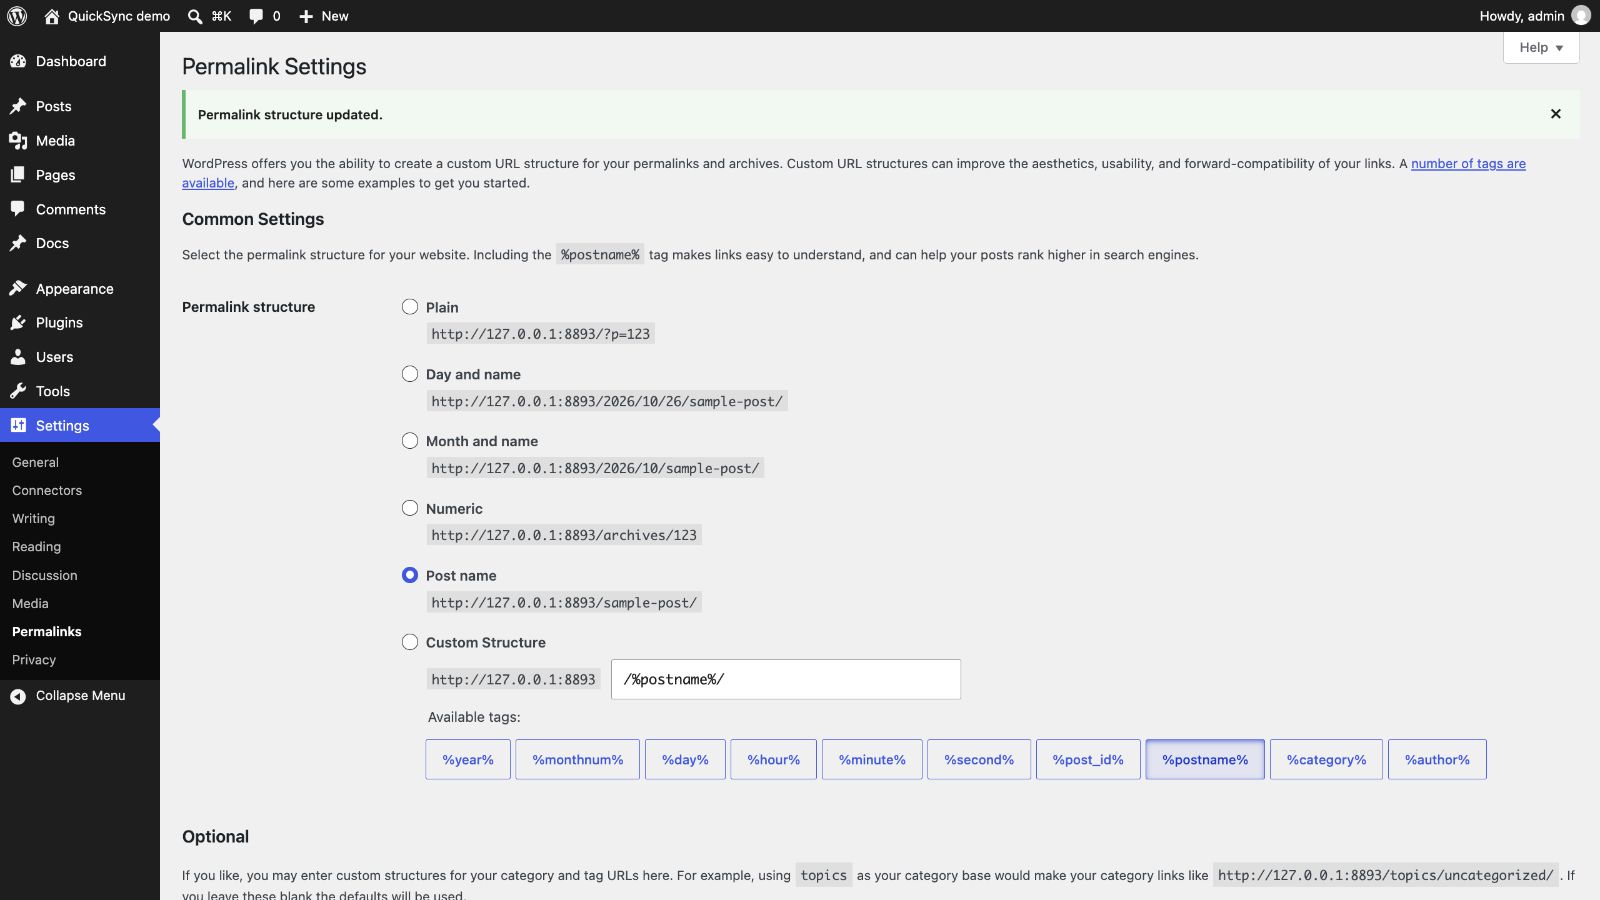
WordPress should confirm Permalink structure updated. If it instead asks you to update .htaccess, send that message to your hosting provider. Ask them to check the site’s rewrite rules before continuing.
Connect again
- Return to QuickSync. Open Settings → Stores → Add a store. If you’re still in setup, use Connect another store.
- Choose WooCommerce and enter your site’s full address, such as
https://example.com. Include the folder if WordPress is installed in one, for examplehttps://example.com/shop. - Continue to WooCommerce and approve QuickSync’s access when prompted.
- Wait for the connection result in QuickSync. Opening the approval page alone doesn’t confirm that the store is connected.
For the rest of the connection steps, see Connect WooCommerce. You don’t need to create or paste API keys for this approval flow.
Still not connecting?
If the connection still fails after saving, check these before changing more settings:
- Store address. Use the address where WordPress and WooCommerce are installed, including any subfolder. Don’t enter a product page or a
/wp-admin/address. - HTTPS. Make sure the site opens over HTTPS without a certificate warning.
- WooCommerce. Confirm the plugin is active and you’re approving access as an administrator.
- Hosting or security rules. Ask your host whether a firewall, redirect or security plugin is blocking WooCommerce’s
/wp-json/wc/v3/routes. You don’t need to disable every plugin to check this.
If you need help, contact QuickSync support with your store address, the exact error and a screenshot of the permalink setting. Leave passwords, API keys and customer details out of the screenshot.
For reference, see WooCommerce’s REST API requirements and WordPress’s permalink settings guide.