This QuickSync setup guide will walk you through the process of creating your account and connecting your sales channels so you can start syncing products, inventory, and orders automatically.
QuickSync helps merchants manage multiple sales channels from one place. Once your stores are connected, QuickSync keeps your product data, stock levels, and orders synchronized across all platforms in real time.
Follow the step-by-step instructions below to complete your setup.
Step-by-Step Guide QuickSync Setup Guide #
1. Visit the QuickSync Website #
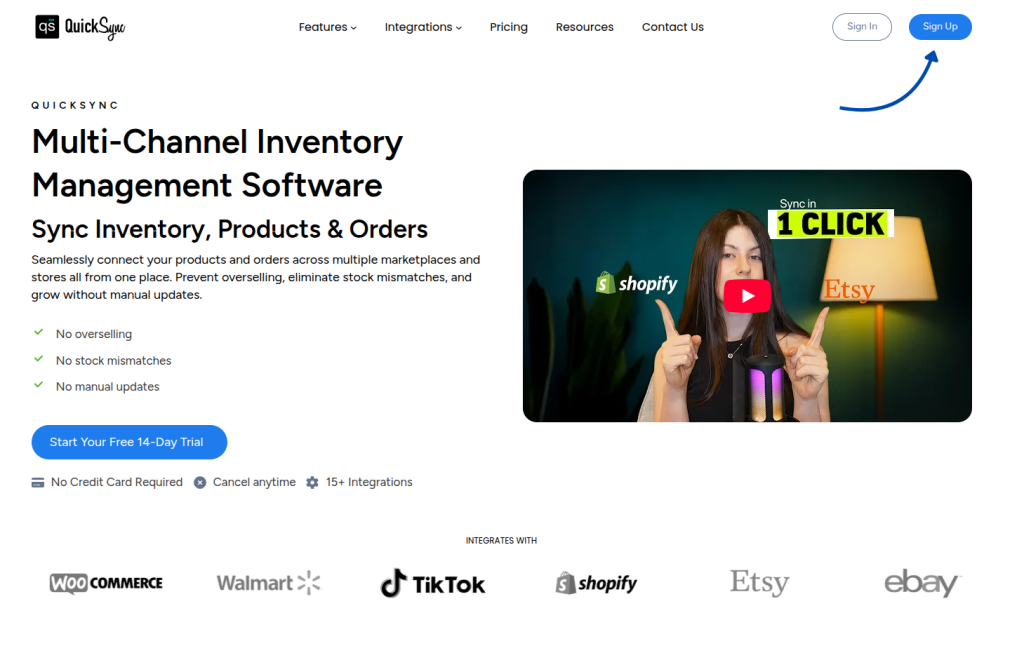
Go to the official QuickSync website and open the Sign Up page to create your account.
From there, you can begin the process of connecting your stores and enabling multichannel syncing.
2. Create Your QuickSync Account #
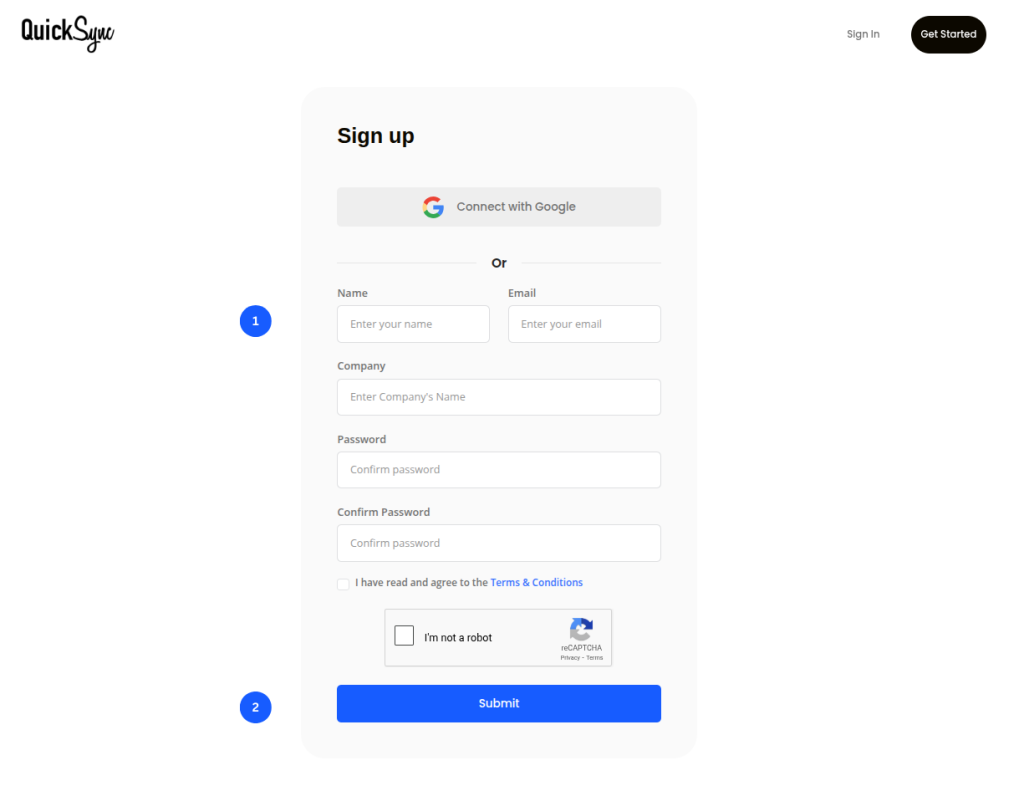
Enter your email address and password, or sign up using your Google account.
After creating your account and logging in, QuickSync will guide you through a short setup process where you will:
- Connect your sales channels
- Configure store settings
- Map locations (if applicable)
- Select syncing preferences
- Review your configuration
Completing these steps ensures that your product, inventory, and order synchronization work correctly from the beginning.
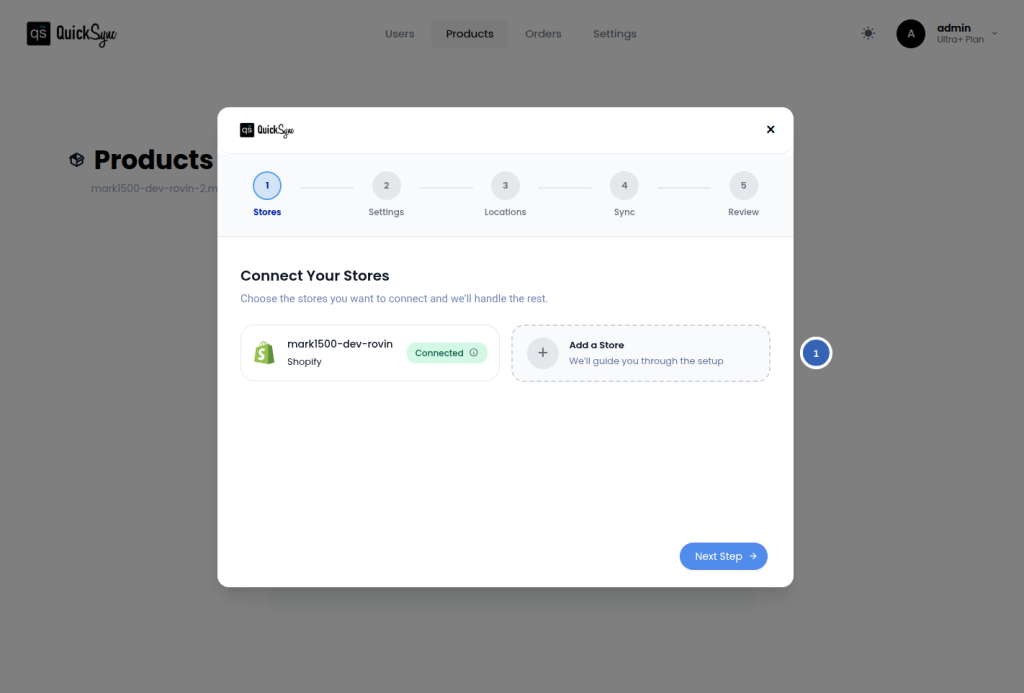
3. Connect Your First Store #
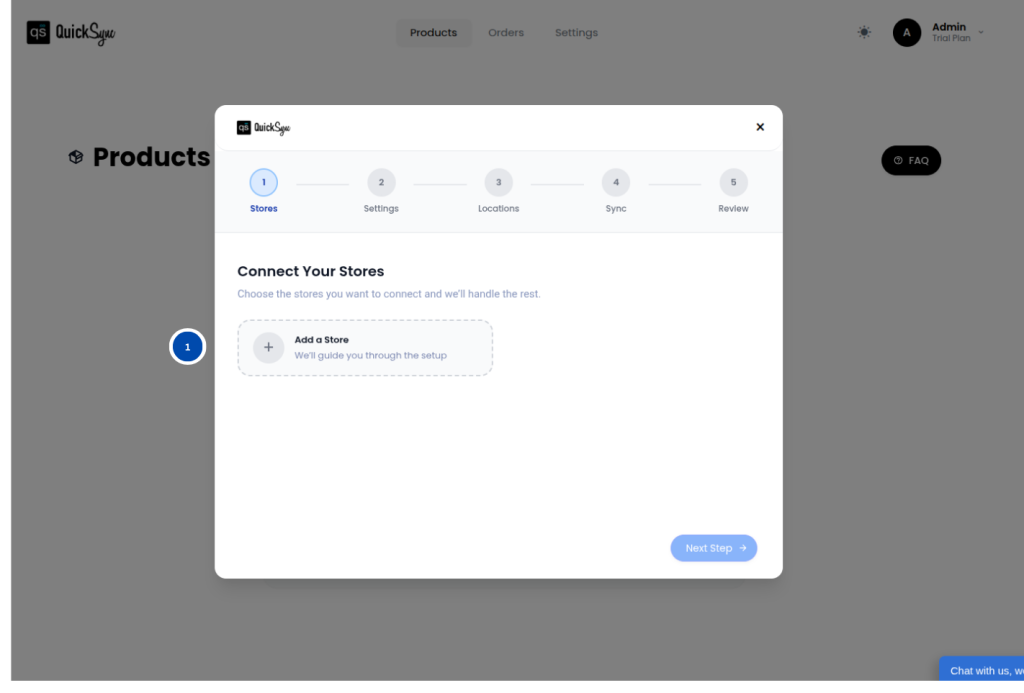
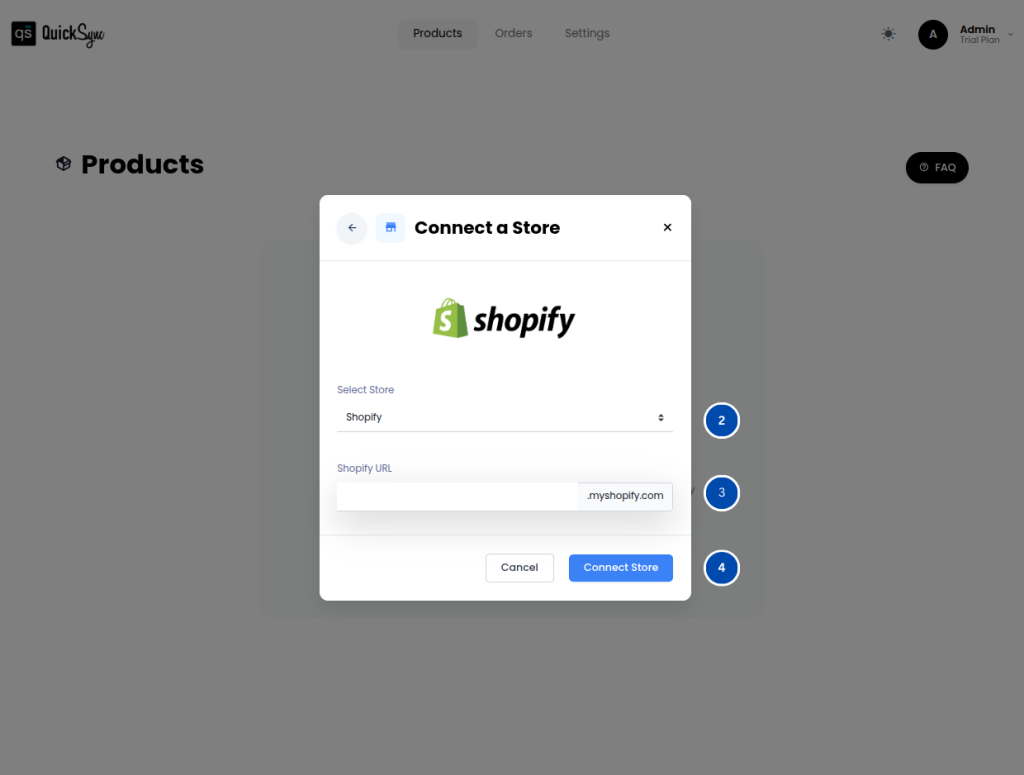
The next step in the QuickSync setup guide is connecting your first sales channel. You just need to choose your store from the dropdown menu and proceed as shown in the screenshot.
Once connected, QuickSync will be able to access your store’s product catalog and inventory data. This step is only required if you signed up directly on the QuickSync website.
In case you installed QuickSync through an app marketplace such as Shopify App Store or Clover App Marketplace, then your first store is already connected automatically.
4. Connect Your Second Store #
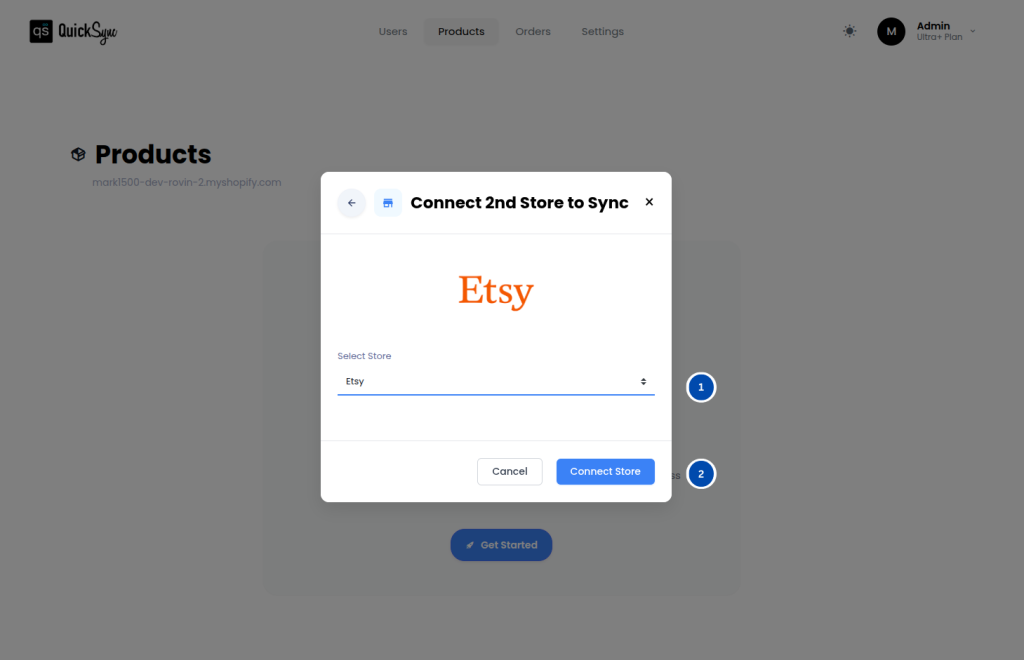
To enable multichannel syncing, you must connect at least one additional store. After connecting your second sales channel, QuickSync will be able to:
- Sync product information across stores
- Keep inventory levels updated automatically
- Send orders to your chosen fulfillment store
This allows you to manage multiple stores without updating each platform manually.
5. Review Default Settings (Optional) #
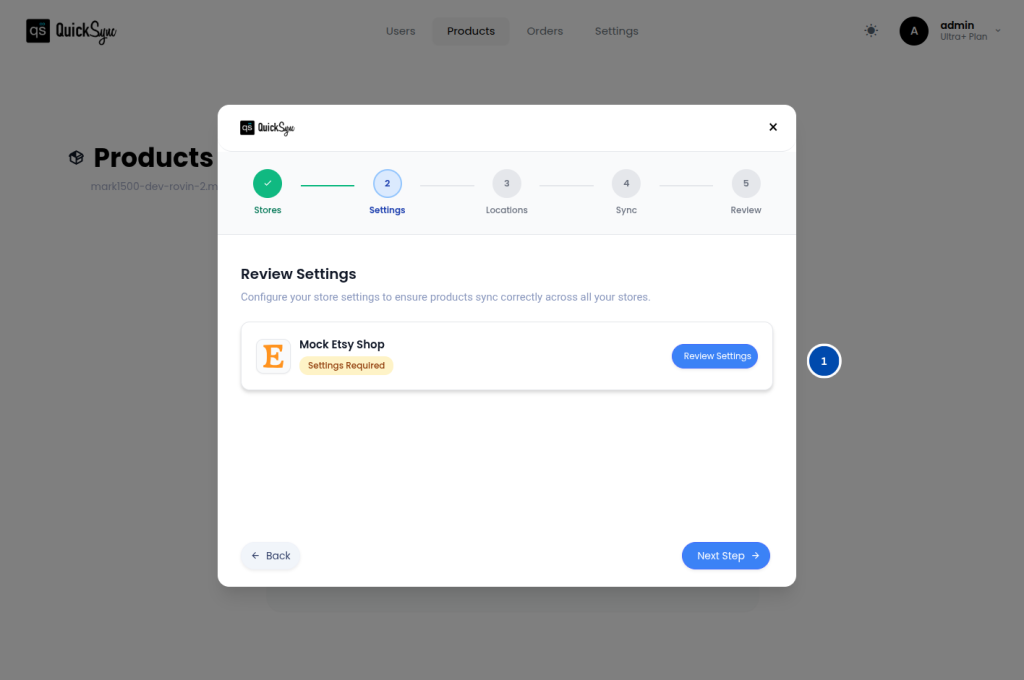
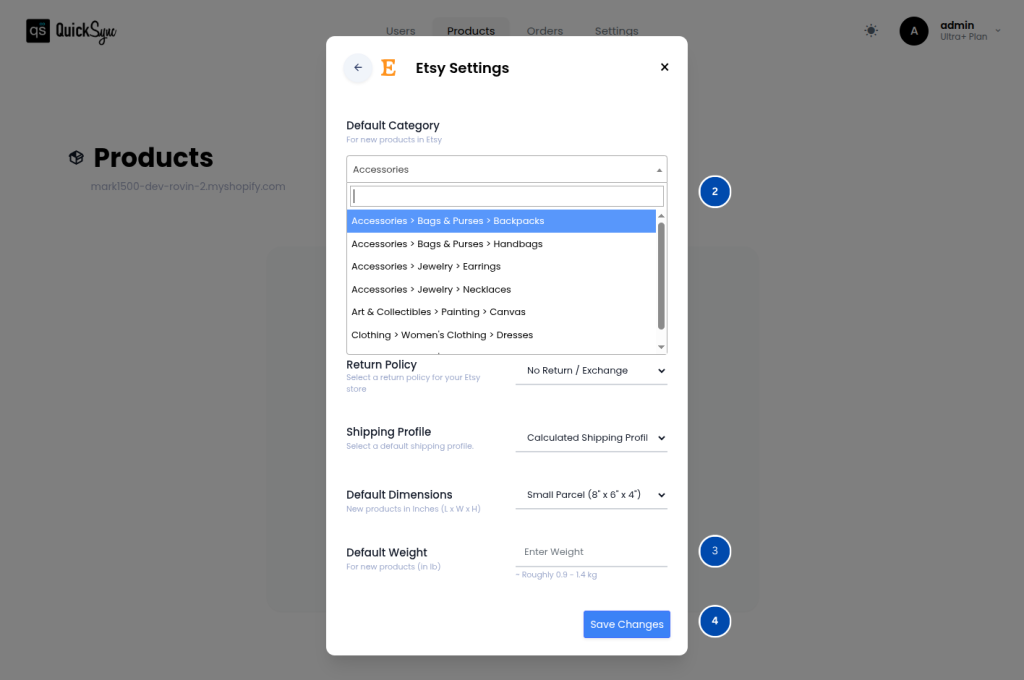
QuickSync allows you to configure default product settings that will apply when exporting products between stores.
You can configure values such as:
- Default product categories
- Package dimensions
- Weight units
These values are applied automatically to exported products unless you customize them individually.
Note: This step is only required if a marketplace integration (such as TikTok, Etsy, or eBay) is connected; otherwise, proceed to the next step.
6. Connect Store Locations (Optional) #
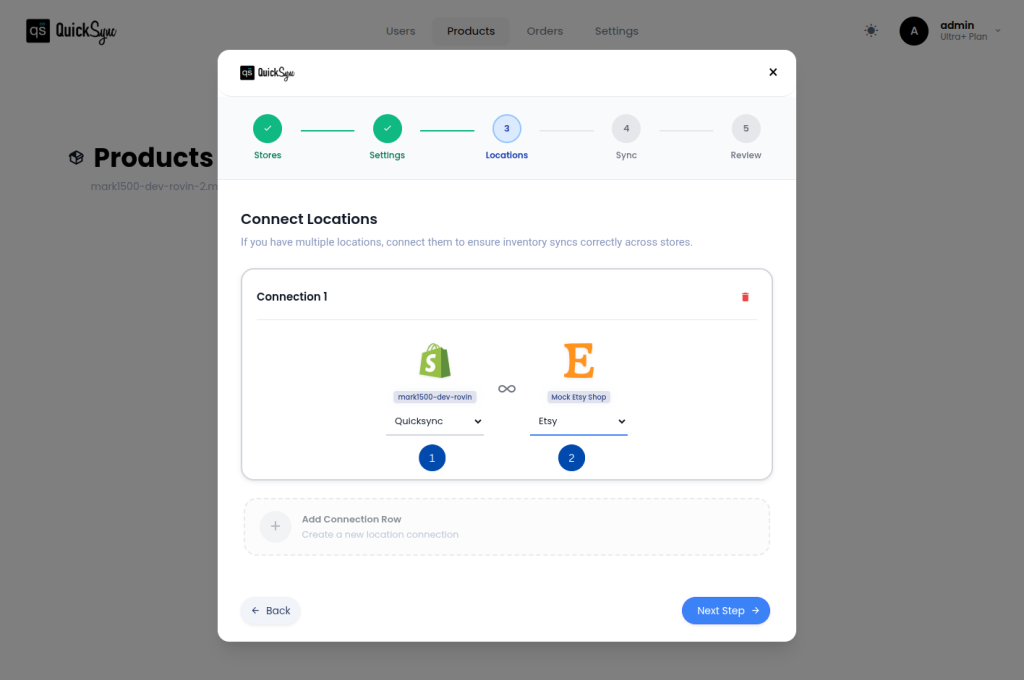
If your stores have multiple locations or warehouses, QuickSync will prompt you to map locations between platforms. This ensures accurate inventory syncing across different warehouses or retail outlets.
For example, you may connect:
- Shopify warehouse location
- Retail POS location
- Regional fulfillment center
Mapping locations correctly prevents overselling and keeps inventory counts accurate across all connected stores.
Note: This step is required only if QuickSync detects multiple locations in your connected stores.
7. Choose Inventory Syncing Preferences #
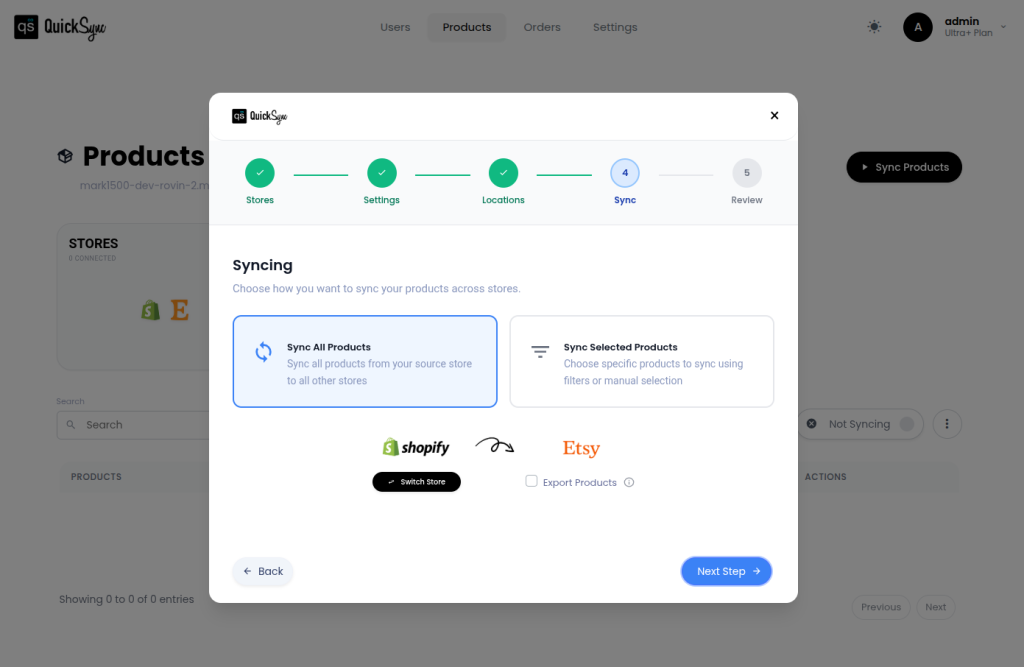
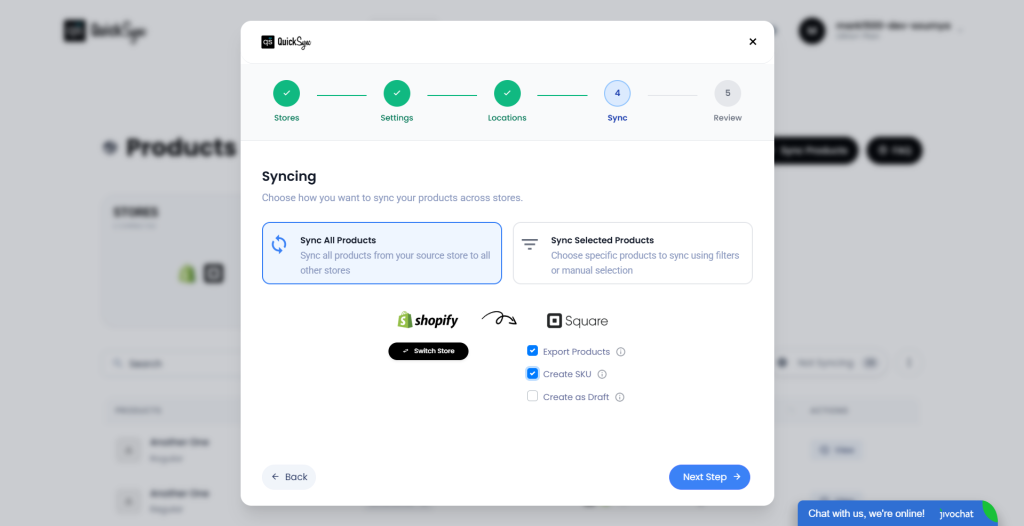
Next, choose how inventory levels should sync across your connected sales channels. QuickSync provides two options depending on your business needs.
- Automatic Inventory Sync: Stock levels are automatically updated across all connected stores whenever a sale or change occurs. This option is ideal for merchants who want real-time, hands-free inventory consistency.
- Selective Inventory Sync: You can choose specific products to sync inventory for between stores. This option gives you more control over which items maintain shared stock levels.
- Export Products: Enables pushing/sending the selected products from the source store to the connected destination store(s). If unchecked, product data is not exported.
- Create SKU: Automatically generates SKU values for products/variants during sync when SKUs are missing (or based on your app’s SKU rule).
- Create as Draft: Creates imported/exported products in Draft status on the destination platform instead of publishing them live immediately.
Features Available #
QuickSync provides several tools to simplify product management:
- Flexible Product Syncing: Sync all products automatically or choose selective syncing based on your business requirements.
- Easy Product Management: Export products between stores and automatically generate SKUs to keep your catalog organized.
8. Review and Confirm Your Setup #
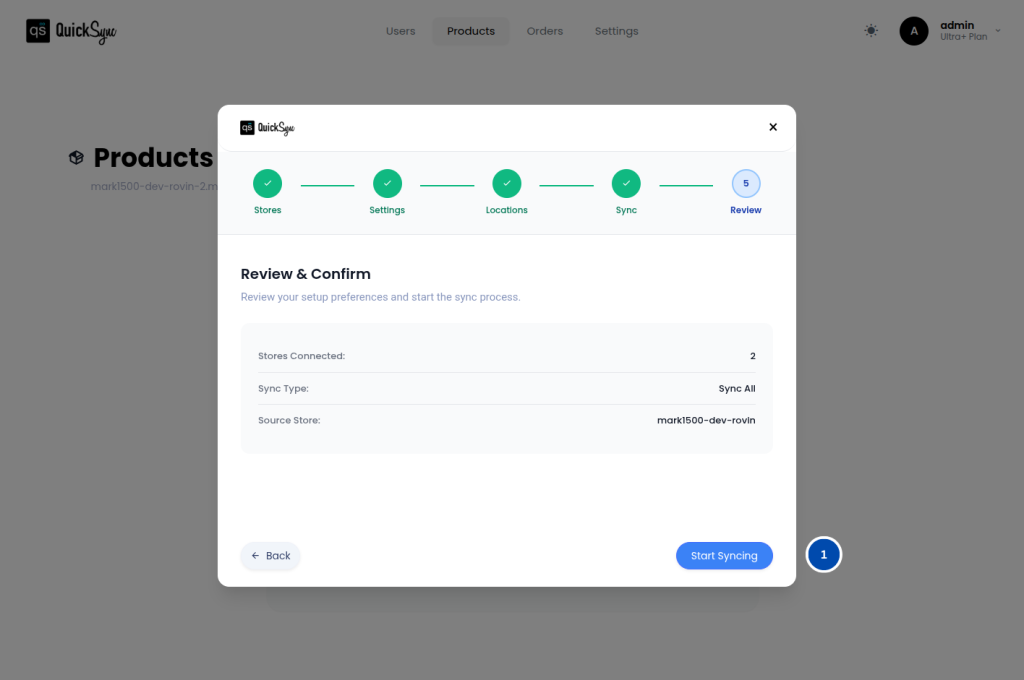
Before enabling syncing, QuickSync will display a summary of your setup.
This allows you to review:
- Connected stores
- Selected settings
- Location connections
- Product syncing preferences
Once you confirm everything, QuickSync will activate synchronization and begin syncing your products, inventory, and orders in real time.
After setup is complete, you can manage your entire multichannel business from the QuickSync dashboard.
Supported Platforms #
QuickSync supports integration with several popular e-commerce and POS platforms including:
- Shopify
- WooCommerce
- Clover
- Square POS
- Squarespace
- Amazon
- Etsy
- eBay
- BigCommerce
- TikTok
- QuickBooks
This allows merchants to connect both online stores and physical retail locations for seamless inventory and order management.
Frequently Asked Questions- #
Need Help With QuickSync Setup? #
If you need assistance while following this QuickSync setup guide, our support team is ready to help.
Contact us at support@quicksync.co, and our team will assist you with connecting your stores and configuring your syncing settings.